 Hybrid Cloud
 Cybersecurity
 Data & AI
 IoT & Connectivity
 Industry
 Health
 Banking and Finance
 Public Sector
 Retail
 Tourism and Leisure
 Transport & Logistics
 Energy & Utilities
 Smart Cities

Backing up your Office applications is easy with acens Cloud Backup M365
Safeguarding your company's vital information hosted on Office 365 applications has become an unquestionable priority in today's business environment. This process is simplified and becomes more accessible than ever with Cloud Backup M365 by acens, part of Telefónica Tech.
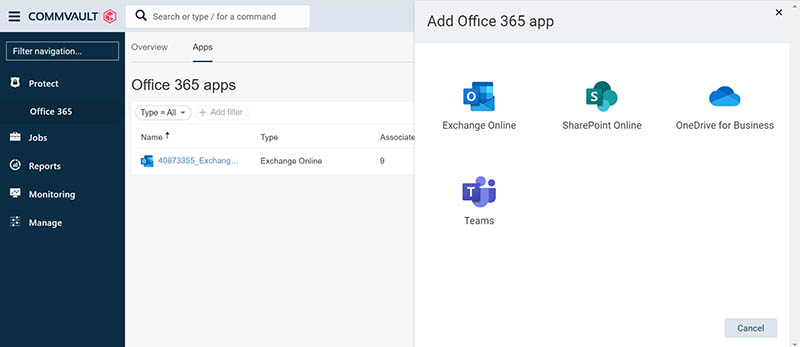
Once inside the control panel we can perform the integration of Microsoft Office 365 by adding the applications, which can be Exchange Online, Sharepoint Online, OneDrive or Teams.
We will need to go to the menu on the left and go to Protect > Office 365. It will direct us to a screen where we will have to click on the top tab 'Apps' and the 'Add Office 365 App' button, so that the four options we have available are displayed. We select the one we want to add, complete the form, and follow the steps that the platform tells us to create the application.
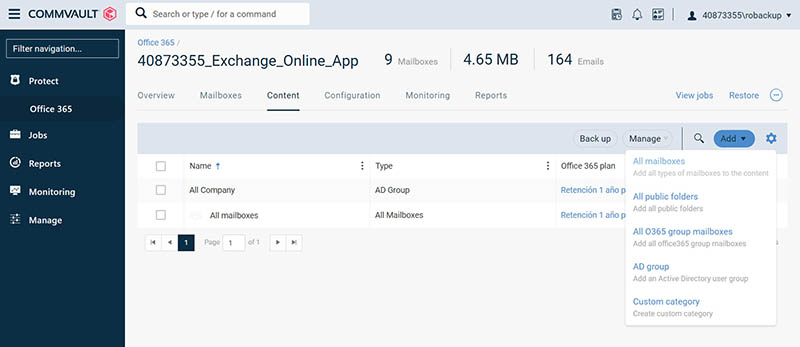
Once the application has been added, we have 3 options when configuring the backups:
- Backup of the entire organization.
- Backup of a selection of users.
- Backup of a selection of users, sites, and computers
Access the menu Protect > Office 365 > Apps and click on the application we have created. We enter the 'Content' tab and click the 'Add' drop-down, choosing for example the option 'All mailboxes', to back up all the accounts of the organization, prioritizing the protection of the company's information. Select our Office 365 plan and click on 'Save'.
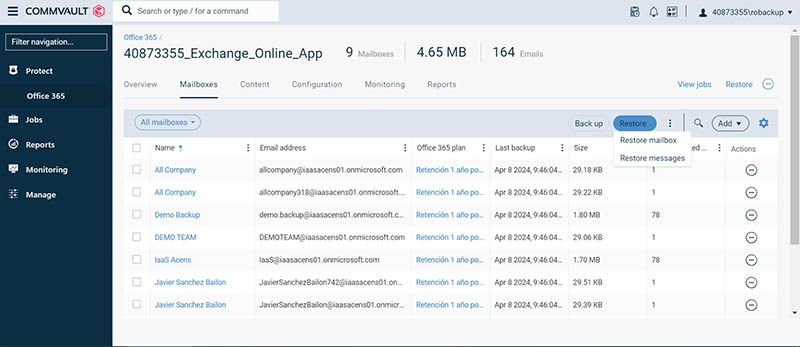
To restore a backup, we go back to the menu Protect > Office 365 > Apps, click on the application that interests us and enter the 'Mailboxes' tab. We check the box of the mailboxes we want to recover and click the 'Restore' drop-down.
We will be shown two restoration options:
- Restore mailbox: it will restore the entire mailbox of the selected users.
- Restore messages: will restore the selected messages, without the need to restore the entire mailbox
After choosing one of the options, we will have to choose if we want to restore the data in its original location or restore data in another location (we will have to indicate the mailbox and the folder). In the message options you can choose whether to skip if the message exists or overwrite unconditionally. To finish, click on 'Send'.
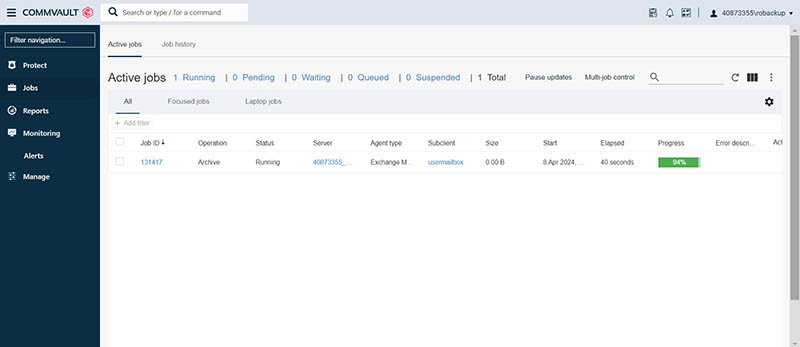
To check the status of the restoration, go to the 'Tasks' menu. We can there see the actions in execution and the percentage of progress. We will have more information and reports in case there has been any incident by clicking on the task name.
In the Monitoring > Alerts menu we can see the active alerts, as well as create them from the 'Alert Definition' tab if you have a self-managed plan. You can configure an email to be sent to you if a Backup fails by clicking on the 'Add alert definition' button.
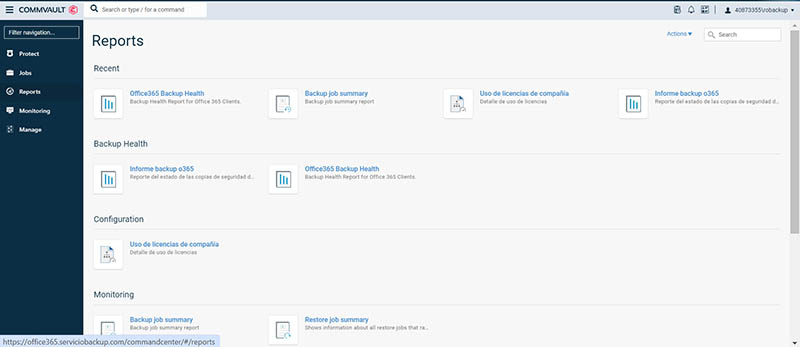
Finally, in the 'Reports' menu you will find the reports of your backups for each application. You have the option to download them in .pdf format. You also have details of license usage and task monitoring.

Image by Ed Hardie / Unsplash.